PLEASE NOTE: This page is OUT OF DATE. Many of the
features here may still be useful, but I do not pretend that they
reflect the state of the art for Photoshop.
Adobe
Photoshop is a program which can do astonishing things with
images. This page is not intended to provide even a cursory overview
of all it is capable of (nor be a product endorsement!), but will
hopefully illustrate some of the useful features that it has.
Note that many of the capabilities mentioned here are possible
in other programs as well -- if you don't have Photoshop,
you may find that the same tricks are available on something that you
have.
First, what is possible? First, a disclaimer: I do not pretend to be
particularly adept at using image manipulation programs. However,
I've had fun playing with all of this
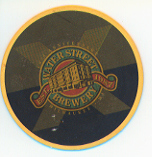
Figure 1: Scanned Image

|
In the following, we consider:
These are outlined by a series of steps that you should be sure to do
if you are following along in PhotoShop, denoted by numbers (e.g.,
(3)) in the riveting exposition.
In the course of this exercise, we will consider the scanned image to
the right above. To follow along, (1) download this image
(recall how to do this) and then
(2) fire up Photoshop. In Photoshop, select
File -> Open and open the image that you just saved.
Starting with Photoshop
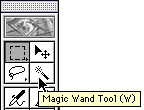
When Photoshop is started, the first thing to note is the toolbar
(shown to the right, figure 2A). This gives a push-button menu of
the different tools available in Photoshop. (3) If you
leave the mouse over a button for a couple of seconds, a helpful label
appears (figure 2B) to explain what it does, and
(4) if the button has a little triangle at the bottom
right corner, clicking the button and holding the mouse button down
calls up a sub-menu of push buttons (figure 2C).
Top | Pshop Index
Selecting Stuff:
The first thing that we have to be able to do is select portions of an
image and play with those. (5) Click on the select ("marquee")
button on the toolbar (the top left button), then go to the scanned
image, click somewhere and drag the mouse while holding the button
down. Release the button, and, voliá!, a portion of the image
is selected. While part of the image is selected, all actions that
affect the appearance of the image are applied only to the selected
portion. (6) Note that by clicking and holding on the select
button you can select different shapes of stuff
(figure 2C -- the funny angle brace at the end of the
submenu is the crop tool, which we will talk about later).
Top | Pshop Index
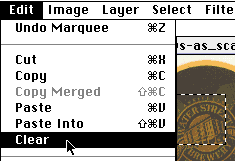
Figure 3A: Clear Region

|
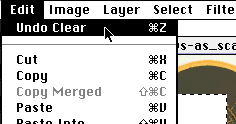
Figure 3B: Undo Clear

|
Figure 3C: Revert Image

|
Clearing and Restoring Selections:
(7) Select some part of the scanned image and
(8) clear it: go to Edit -> Clear at the
top of the screen (figure 3A). Hmm, you may say "why clear it
after going to all the effort of scanning the image in the first
place?" Ok, let's undo it: (9) go to Edit ->
Undo (figure 3B). Important: Photoshop only lets you
undo the one last action you did. To grasp the implications of
this, (10) Select and clear a region, then click somewhere
on the image to deselect the region. What are you able to undo? Try
to undo a couple of times -- does it work? If you want to
restore more than one action, you must revert to the last saved
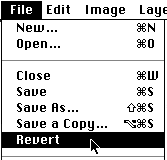
copy, by (11) going to File -> Revert
(figure 3C). Do this to get the image back.
This brings up a cardinal rule of working with Photoshop: Save
regularly.
Top | Pshop Index
Moving Selections:
What good are selections? (12) Select a portion of the
image, and then click on the move tool button (figure 2B). Click in the selected part of
the image and, holding the mouse down, move it to a new location. To
deselect the region, (13) go back to the select tool, and
click somewhere in the image. You may want to (14) Revert
to the original file after playing with this.
Top | Pshop Index
More on Selections:
There are two more tools for selecting parts of an image: the
lasso (the second button down the left side of the toolbar in
figure 2A), and the magic wand (as
seen in figure 2D). The lasso allows
selection of a region that is drawn by hand with the mouse:
(15) use the lasso to select, and then clear, the "X" in
the image. Restore this. The magic wand selects a region that is
like the point that is clicked on -- this isn't very useful for
the grainy image that we're working on right now, but can be
fantastically useful! (16) use the wand to select a region
of the image -- does it do what you expect? If you double click
on the wand-tool button it brings to the fore the "wand options".
Note that one of these is "tolerance". (17) Lower the
tolerance to half what it was and select something in the image;
then increase it to twice what it was and select something. What
happens? As the tolerance goes up, a larger region is selected.
(18) Use the ellipse selection tool (figure 2C) to select a circular section of
the image about the same size as the coaster (yes, it's a coaster).
Then (19) move the mouse until it is over the dotted
selection line and changes. Then click and hold the mouse button, and
move the mouse -- the selection-circle moves too, allowing you to
fit it cleanly over the coaster. Pretty cool, huh?
(20) To make the background of the coaster a solid color,
invert the selection by going to Select -> Inverse on
the menu at the top of the screen, and Use Edit ->
Fill to fill the inverted selection with a color (e.g., the
foreground color -- which is given in the larger box towards the
bottom of the toolbar (the black box in figure 2A) which is in the foreground. To
swap the foreground and background, click on the arrow above those two
boxes; to change either color, click on the box).
Top | Pshop Index
Figure 4: Crop Image

|
CHECK THIS
Rotating Images:
The rotate image option is under Image -> Rotate
Canvas. (21) Use Image -> Rotate
Canvas -> Arbitrary to rotate the image so that it is
"upright". What happens to the image?
Top | Pshop Index
Cropping Images:
To crop the image to a small size, (22) use the crop
tool in the select button (figure 2C)
to select the region you want to keep. Note that after drawing a
region you can change its size by dragging the tabs at the side of the
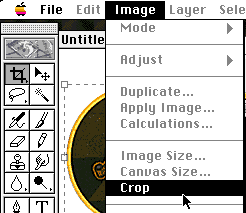
region. Then (23) select Image -> Crop
(figure 4) to crop the image. Is the background still a solid
color? If not, (24) Select the coaster, invert the
selection, and re-fill the background.
Top | Pshop Index
Enhancing Images:
There are two types of enhancement that we'll talk about here:
colors and levels, and sharpening. First, let's improve
the colors in our image. To start, use the autolevels utility:
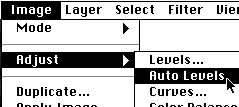
(25) select Image -> Adjust ->
AutoLevels (figure 5). This is often the best place to
start in enhancing a scanned photo or other image.
(26) The next place to go is variations, at the
bottom of the Image -> Adjust menu. This gives a
panoply of options to darken, lighten, or otherwise change the colors
of the image: click on one of the options to change the colors, then
say "OK" when you've got something you like.
Figure 6: Sharpen Filter

|
Next, let's use a sharpen filter to make the image a little crisper.
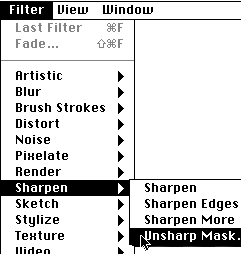
(27) Select Filter -> Sharpen ->
Unsharp Mask... from the menus at the top of the screen. Is it
obvious what happened? Try undoing and redoing the sharpen (see clearing and restoring, above) to see.
(28) Sharpen the image using the Unsharp Mask filter a
couple of more times. Stop when it starts to make the image worse.
(Note that it is generally better to do the sharpening in a series of
steps like this rather than in one big step.) Then
(29) save your image.
Top | Pshop Index
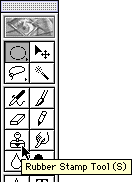
The Clone (Rubber Stamp) Tool:
The clone tool (figure 7) is located on the toolbar (figure 2A). To see how it works,
(30) select the clone tool from the toolbar, and then
(31) set the region to clone by holding the "Option" key
down and clicking somewhere in the image (e.g., about a fourth of the
way in at the top). Then release the option key, and try out the
cloning: for the sake of an example, (32) click somewhere
else in the image (e.g., around the center) and, holding the mouse
button down, move the mouse down to the bottom of the page. What
happened? You have successfully cloned a strip of the image and put
it somewhere else. (33) Undo this handiwork and use the
clone tool to get rid of the blemishes at the bottom left of the
image -- select (option-click) somewhere near a blemish, and then
clone away the blemish. To make it easier to see what you are doing,
you might want to (34) go to Window -> Zoom
In to make it easier to see what you're working with. You may
also have to set the "brush size" in the "brush options" floating menu
(if this isn't in evidence, look under the Window options).
Figure 7: Clone (Rubber Stamp) Tool

|
Top | Pshop Index
Saving Images for the Web:
An issue critical to adding images to your Web pages is that they not
make your page too big. One style manual (All Things Web) suggests that
any page over 20KB (images plus text) is at best an adequate size.
For comparison, this page (images and text) is about 60KB (which for
the number of images on it is pretty good, but may be too
big -- I probably should split it into different pieces); my home page, about 20KB, and the Math/CS home page a svelte 10.3KB. Of the 50KB on this
page, approximately 35K, or 70%, comes from the images -- and
that's doing pretty well: this
picture of the beautiful (?) building in which I work weighs
in at a ponderous 80K (but could be made much smaller).
When saving files as GIF files, one way of reducing the sizes of the
images is to reduce the number of colors in the image. Often this can
result in a dramatic size reduction without noticably reducing the
quality of the images. To do this in PhotoShop,
(35) first change the image to Indexed Color Mode
(under Mode in the Image menu -- see figure 5, above). To reduce the number of
colors, (36) try setting the color map to "adaptive"
and the Color Depth to four, five, or six bits/pixel. Try one and see
if the image is noticably worse for the change. If so, undo the
change and try again with more bits/color. (Note that it is not a
good idea to go below 16 colors in an image, for compatibility with
older monitors that people could be using to view your pages.) Then
to save save the file, select (37) File ->
Save As, and change the file format to "GIF". When saving you
have a choice of "interlaced" or "non-interlaced". Non-interlaced may
be slightly smaller.
Another way of reducing the size of files is to save them as JPEG
files instead of GIF files -- JPEGs have built-in compression,
which makes them smaller than they would otherwise be. For an image
that degrades badly when the number of colors is reduced, JPEG might
be a good way of saving it. The file that you downloaded from the Web
is a JPEG file. (38) Re-open the JPEG file, and select
File -> Save As, and check that the file format is
JPEG. When you say "OK", you are asked about the compression to
use -- the higher the compression, the worse the quality. The
best way to choose a compression is to try something and see how it
turns out by reopening the file that you just saved.
(39) Save the file twice (with two different names), with
a "Fair" image quality and a "Good" image quality. Then
(40) Open both files in Photoshop. Can you see the
difference between the two?
Finally, to further reduce the size of any file, be sure that you
aren't saving extra information for previews or thumbnails that won't
be used for the Web: (41) select File ->
Preferences -> Saving Files, and be sure that saving
"Image Previews" is set to "Never" or "Ask before saving".
(42) Re-save your GIF and JPEG files with previews turned
off if they weren't before.
How big are the files that you saved? To see, (43) double
click on the icon for the computer's hard disk, and open the finder
to find the files you saved. (44) Click once on
one of the files and then select File -> Get Info.
The number of bytes used is the size of the file.
This concludes our basic tour of Photoshop!
Photoshop Overview
Last Modified: Fri May 31 09:50:18 EDT 2002
Comments to
glarose@umich.edu
